Video editing has become very popular in recent years. Many creators, YouTubers, and social media users want to create professional videos directly from their mobile phones. One powerful mobile video editing application that helps users create amazing edits is Alight Motion. It offers many advanced features like animation, keyframes, visual effects, blending modes, and masking.
Among these tools, masking is one of the most useful features. If you want to hide certain parts of a video, highlight an object, create cinematic transitions, or produce creative effects, masking can help you do all of these things easily.
Many beginners feel confused when they first see the masking option. They often think masking is difficult or only for professional editors. But the truth is that learning how to do masking on Alight Motion is actually very simple once you understand the basic steps.
Masking allows you to show only a selected portion of a layer while hiding the rest. For example, you can reveal a person inside a shape, create spotlight effects, make text appear behind objects, or create smooth transitions between clips.
In this detailed guide, you will learn how to do masking on Alight Motion step by step. This article explains everything in very simple language so beginners can understand it easily. You will also learn different masking techniques, common mistakes, and tips to make your edits look more professional.
By the end of this article, you will be able to confidently use masking in your video edits and create amazing visual effects.
Understanding Masking Feature In Alight Motion
Before learning how to do masking on Alight Motion, it is important to understand what masking actually means in video editing.
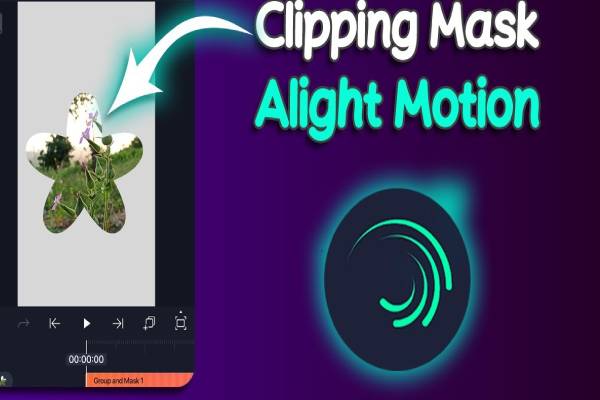
Masking is a technique that allows you to hide or reveal specific parts of a video or image layer. Instead of showing the entire layer, masking lets you display only the area you choose. Everything outside the mask becomes invisible.
For example, imagine you have a video of a person standing in a park. If you apply masking, you can show only the person and hide the background. You can also show only a small circular portion of the video while hiding the rest.

In Alight Motion, masking works by using shapes or layers as masks. The mask layer controls which part of the video will be visible. When you place a mask on top of another layer, it determines what will appear in the final video.
Masking is used for many creative purposes, such as:
- Highlighting objects in a video
- Creating cinematic reveal effects
- Making text appear behind objects
- Creating transitions between clips
- Adding focus effects to important elements
- Combining multiple clips creatively
One of the best things about masking in Alight Motion is that it works together with keyframes. This means the mask can move, resize, or animate over time. Because of this feature, editors can create dynamic effects such as tracking objects or revealing elements gradually.
For beginners, masking might look like a complex editing technique. But once you understand the basic idea — a mask simply hides or reveals part of a layer — everything becomes much easier.
Understanding this concept is the first step in mastering how to do masking on Alight Motion and creating professional video edits.
Step By Step Masking Process Guide
Now let’s learn the most important part: how to do masking on Alight Motion step by step.
Follow these simple steps carefully.
Open Alight Motion Project
First, open Alight Motion and create a new project. Choose your preferred resolution and frame rate. Most editors use 1080p resolution and 30fps for social media videos.
S Import Your Media
Next, import the video or image you want to edit.
Tap the plus (+) icon, select media, and choose the clip from your gallery. The clip will appear on the timeline.
Add Mask Layer
To apply masking, you need another layer that will act as the mask.
Tap the plus (+) button again and add a shape or another element. Common shapes used for masking include:
Tips For Professional Masking Results
If you want your edits to look professional, here are some useful tips for mastering how to do masking on Alight Motion.
Keep Mask Edges Smooth
Sharp edges sometimes look unnatural. You can soften mask edges slightly to create a smoother and more natural effect.
Combine Masking With Effects
Masking works best when combined with other effects like blur, glow, or color grading.
For example, a blurred background with a masked subject creates a cinematic look.
Use Keyframes For Animation
Keyframes are extremely powerful when used with masks. They allow you to animate the mask position, size, and rotation over time.
This creates smooth motion effects.
Practice Simple Projects First
If you are new to masking, start with simple projects. Try creating spotlight effects or text reveals before attempting complex animations.
Watch Professional Edits
Watching professional edits can help you understand how experienced editors use masking creatively.
You can learn new ideas and techniques by observing their work.
With practice and patience, you will soon master how to do masking on Alight Motion and create impressive video edits.
Conclusion
Masking is one of the most powerful tools available in Alight Motion. It allows editors to hide or reveal specific parts of a video and create creative visual effects.
Although it may look complicated at first, learning how to do masking on Alight Motion becomes easy once you understand the basic concept and follow the correct steps.
In this guide, we explored what masking is, how to apply it step by step, different masking techniques, creative effects, common mistakes, and useful tips.
By practicing regularly and experimenting with different mask styles, you can create professional-quality edits directly from your mobile phone.
Masking not only improves the visual quality of your videos but also helps you stand out as a creative editor.
So open Alight Motion, try these techniques, and start creating amazing edits today.